Understanding Avalanche Beacon Search Techniques
When a companion is buried, the transceiver in your hand is the single most important tool you carry, and the first minutes of a search determine the outcome far more than any gear specification. This overview walks through how a standard beacon search unfolds in phases, but reading about the process is not the same as being able to execute it under stress.
The Signal Search: Establishing First Contact
The signal phase begins the moment you switch your transceiver to search mode. Your goal is simply to acquire any signal from the buried unit within its maximum range, which varies by model and by how many beacons are transmitting nearby.
- Start at the point last seen and move in a systematic search strip, sweeping the beacon side to side at hip height.
- Move at a walking pace — moving too fast can cause your device to miss a weak or intermittent signal.
- Once you get a distance reading, transition immediately into the coarse search.
The Coarse Search: Following the Flux Line
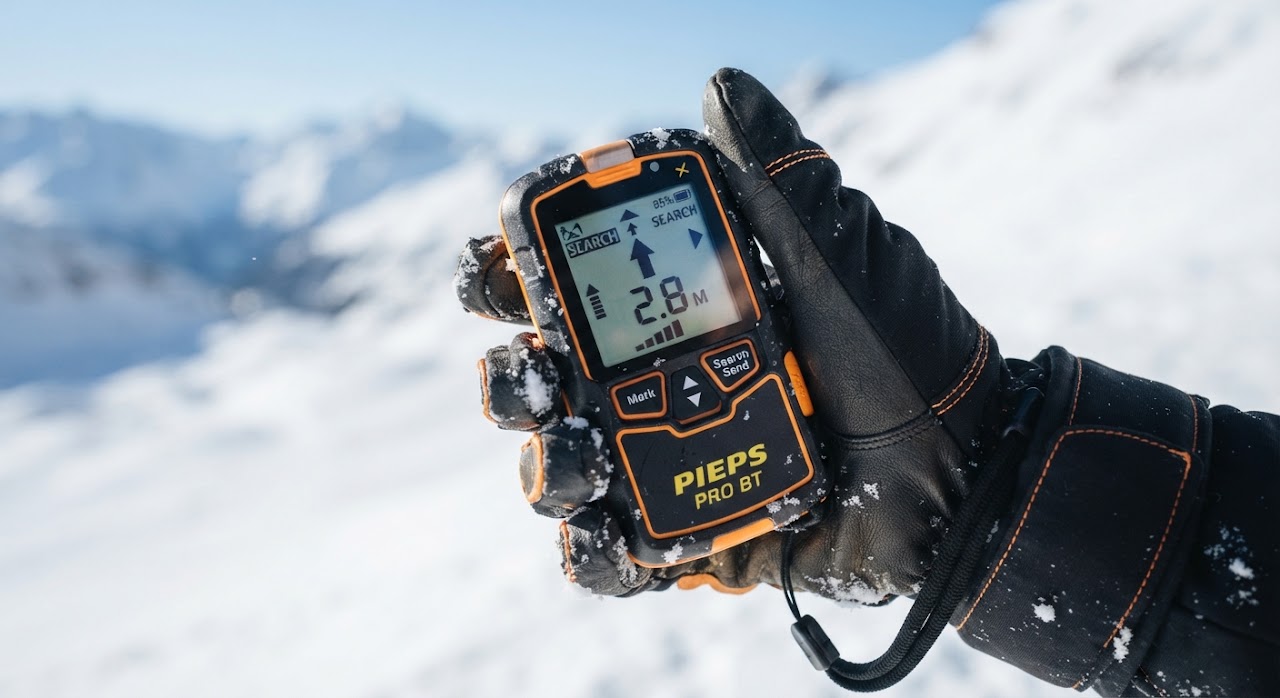
Modern transceivers display a direction arrow and a decreasing distance number once a signal is acquired. Follow that arrow, but understand that beacons don’t guide you in a straight line to the victim — they guide you along a curved flux line dictated by the shape of the buried beacon’s signal field.
- Keep the beacon oriented the same way (flat, pointed forward) as you move toward the signal.
- Watch the distance number decrease steadily; if it increases, you’ve moved off the flux line and need to reorient.
- Slow down as the distance number drops below roughly three meters and prepare to switch to fine search technique.
The Fine Search and Pinpointing
Fine search is where speed gives way to precision. Lower the beacon closer to the snow surface and move it slowly along the snow in a grid pattern — a cross or box shape — to find the point of lowest distance reading in every direction.
- Keep the beacon low and steady, moving it in straight lines rather than arcs.
- Mark the lowest reading point you find, then narrow your grid around it.
- Once you’ve isolated the lowest number, move to probing rather than continuing to chase smaller distance changes.
Probing to Confirm the Burial
The beacon gets you close, but the probe confirms an exact location and depth before anyone starts digging. Starting at the lowest-reading point, probe in a systematic spiral or grid pattern, inserting the probe perpendicular to the slope, not vertically.
A confirmed “strike” — a firm, distinct resistance different from snow or rocks — tells your team exactly where to dig and how deep, saving critical time and energy.
Leave the probe in place once you get a strike and begin strategic shoveling from below the burial point, since digging straight down wastes energy moving snow you’ll only have to move again.
Multiple Burial Complications
Multiple burials add a layer of complexity that a single-victim search doesn’t prepare you for. Overlapping signals can cause a beacon to lock onto the wrong transmitter or jump between signals mid-search.
- Many modern transceivers include a multiple-burial or marking function that can flag a found signal and filter it out of the display.
- Increasing the physical spacing between rescuers can help separate overlapping signal fields.
- If your device lacks marking capability, you may need to reduce search range or use a physical offset technique to isolate a single signal — a skill that requires supervised practice to execute reliably.
Responsible use note: This article describes the general structure of a beacon search for educational purposes only. Real rescues happen under time pressure, in difficult snow, often with multiple victims and injured rescuers. Proficiency comes only from repeated field practice and a formal, hands-on avalanche safety course — this overview does not replace that training.